
A unique piece need not cost a fortune. If you have a special anniversary coming up and want to mark it, send us an enquiry.

|
Commissions Welcomed A unique piece need not cost a fortune. If you have a special anniversary coming up and want to mark it, send us an enquiry. |
|
March 2008 In the light of experience I have now come to the conclusion that having a separate back to the case is not the best solution - essentially even using two screws is not 'elegant' and the need to counterbore the thin back for the screw head leaves insufficient material. This may well be due to the particular timber used but I realy need to find a solution rather than change the material. An invitation to a 60th Birthday celebration set me thinking about a present and the idea of making a case with a solid back and removable bezel came to mind. I had already cut a piece of Olive for a case and back but a redesign reversing the two components wasn't out of the question. 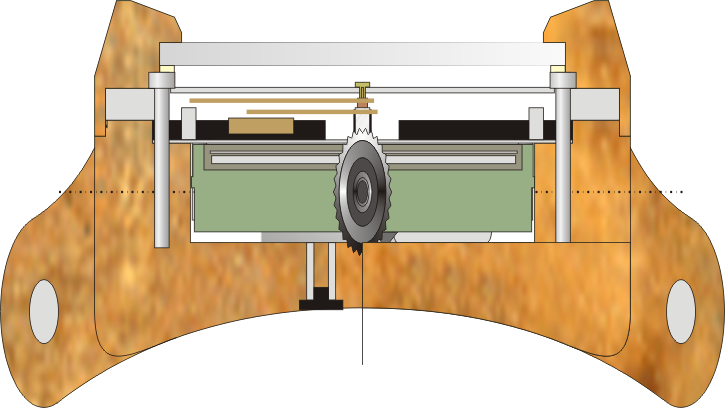
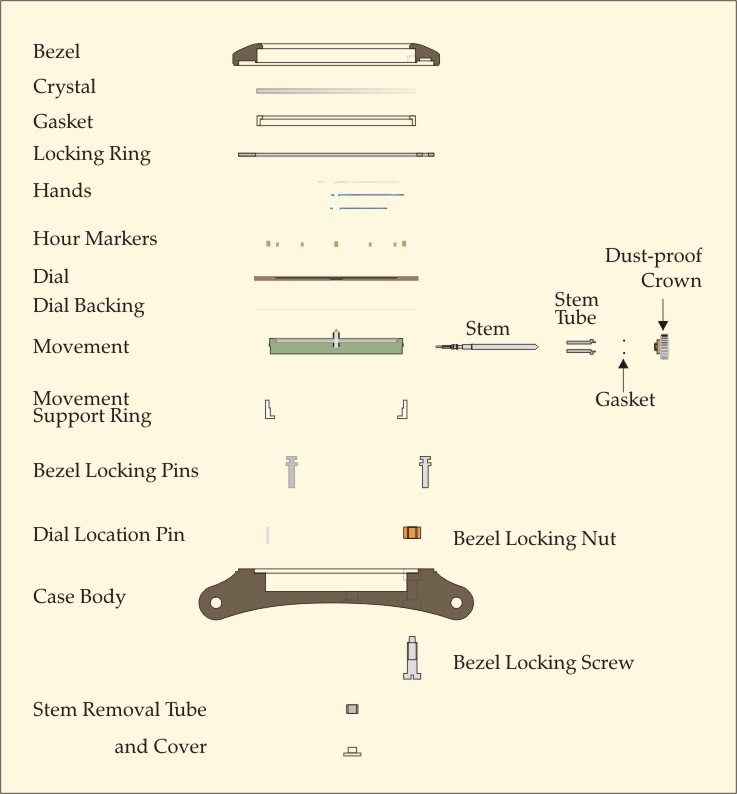
There were a number of obstacles to overcome but the basic consept seemed sound. How to fix the bezel and how to change the battery were two of the most pressing problems. The battery is at the back of the movement so that had to have access (even though it might only be every three years or so). A sliding cover set into the back was conidered but cutting this from the back and still keeping the grain of the wood intact would not be possible and the use of a separate material was not an elegant answer. To take the movement out from the front was the best solution but that required the crown and stem to be removed. To remove the stem one needs to depress a catch which is only accessable from the back of the movement, so it became necessary to drill a hole in the case back exatly in line with the catch in the movement. Further, this hole would have to be covered to prevent ingress of foreign matter. Fixing the bezel didn't cause quite so many hoops to be jumped through but accurate machining would prove to be imperative. The solution was to make a stainless steel ring 0.5mm thick with three 'keyholes' at 120° and glue that into the bezel. This would locate on three Stainless pins with 1.8mm Ø heads and 0.8mm Ø collar. I considered 8° of turn sufficient but now think that 30° would be better. 8° would locate the bezel successfully but the potential for it to come loose while on the wrist was too high to leave as the only fixing. Another hole 0.9mm Ø was therefore drilled into the ring after it was locked in position with the three pins. A 3mm Ø recess was also cut into the case from both front and back using the 0.9mm hole as a guide and a 10BA screw with 0.9mm Ø pin made to lock tight into the case and protrude through the ring. |
|
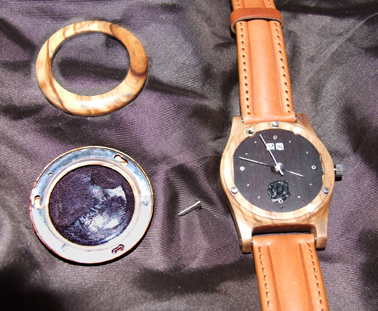
With Bezel removed to show the three Bezel Locking Pins and the the 'keyholed' ring. |
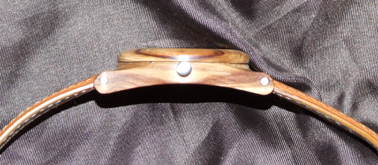
| 'Edge on' view showing the slim profile achievable by using a removable bezel. |
|
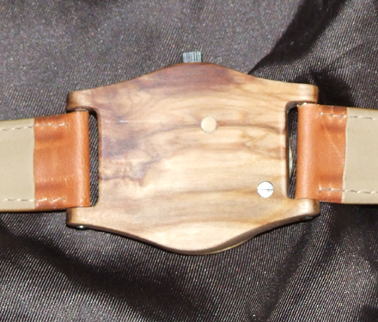
Back view showing bezel locking screw and stem removal tube cover. |
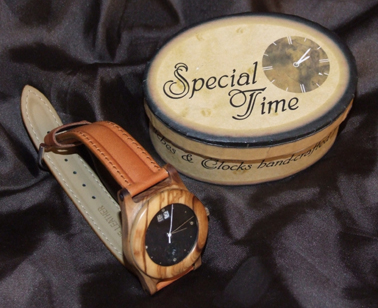
| With Presentation Box. |
| Detailed explosion of construction |
|
|
Dial Markers Hands Compl. |
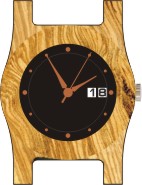
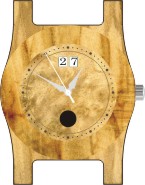 Olive
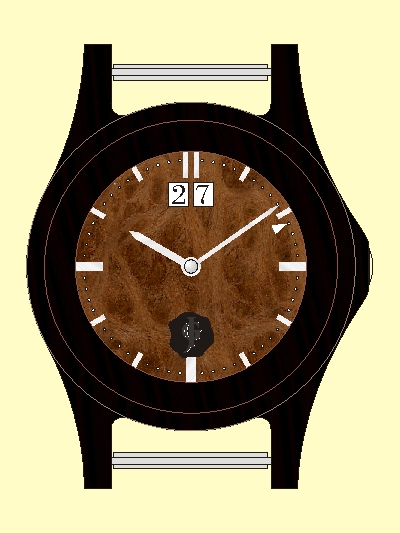
OliveWalnut Titanium Alpha Big Date at 12 |
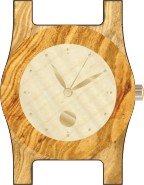
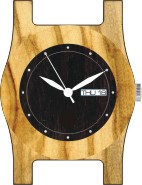 Olive
OliveViolet Rosewood Silver Leaf Day & Date at 3 |
 Chestnut
Ebony Copper Alpha Big Date at 3 |
 Chestnut
Sycamore Gold Leaf Time Only |
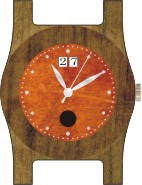 Imbura
Copper Silver Leaf Date at 12 |
 Cocobolo
Spalted Sycamore Titanium Moon Time Only |
 Black Palmira
Birds-eye Maple Bronze/Titanium Alpha Time Only |
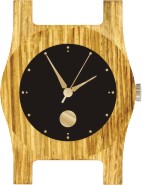 Oak
OakEbony Gold Alpha Time Only |
|
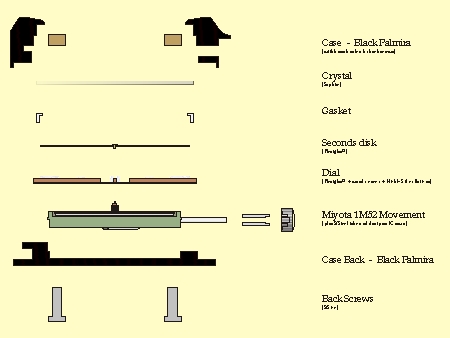
A drawing of the Black Palmira Case Design. |
|
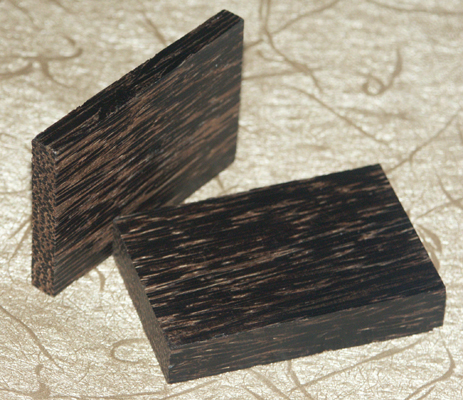
Blanks for the Case Body and Back trimmed to size |
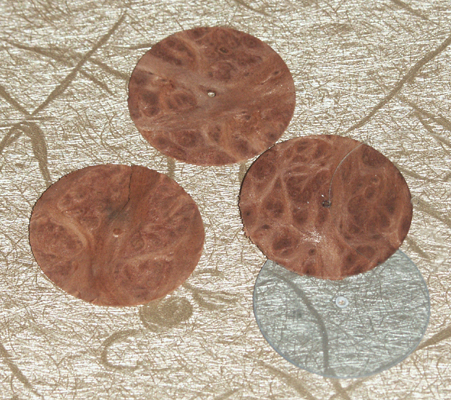
Dial Blanks - both the Veneer and the clear Plexiglas® |
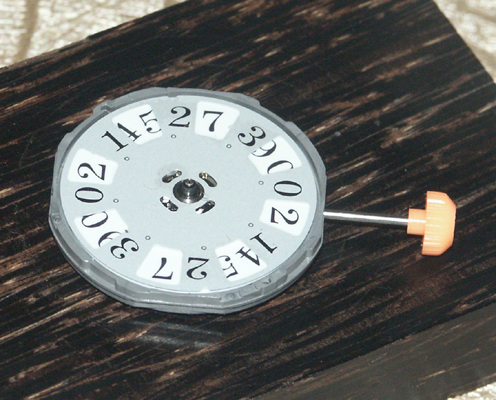
The bare Citizen 1M52 movement |
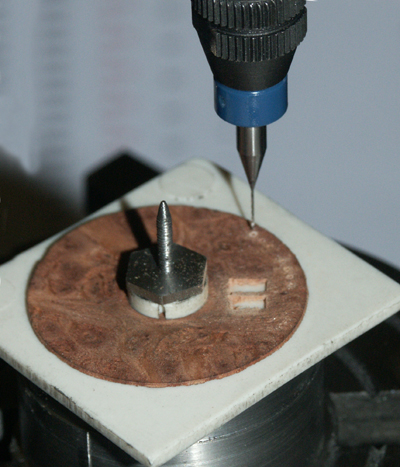
Drilling 0.3mm dia holes in the dial to mark the minutes. This is the Mk 1 version of the jig to hold the Dial Blanks in position. Locating on a 10BA thread and using a 2mm thick plastic washer and a nut. This method has the disdvantage of tending to lift the outside edge of the dial thereby making the veneer 'tear' rather than cut. The original thinking behind his design was that batten 'slotts' to break the edge but on reflection that is in itsellf a disadvantage. The Mk2 version is shown below. The centre locating peg has been reduced to 1.5mm dia x 1mm high in the centre of a 50mm dia boss with a 0.7mm pitch thread plus a mating clampling ring which takes an insrt to suit the diameter of the dial being made. The grip on the outside edge is 0.5mm but it does hold the blank flat and I can mill to the diameter of the crystal which is more than sufficient. |
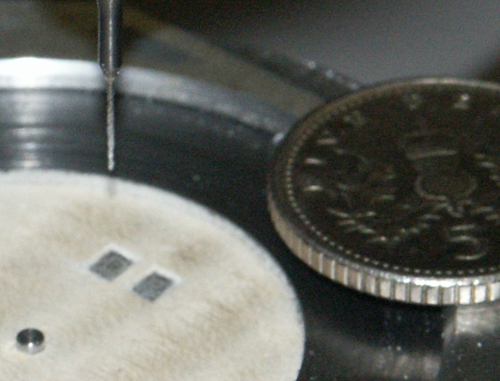
To give a better sense of size, this shows the 'Big-Date' windows relative to a 5p coin. The drill is 0.3mm dia. |
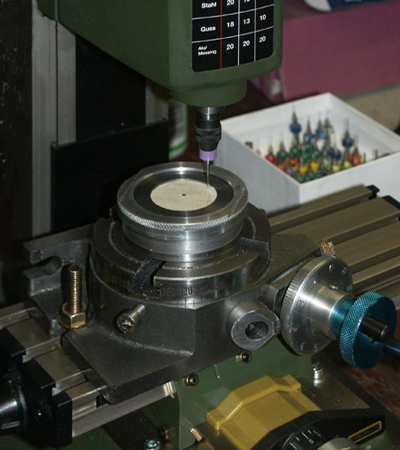
|
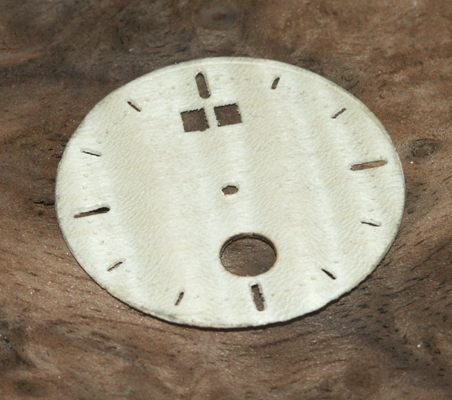
This is a Sycamore dial when all the milling work is complete but prior to the filling of the minute holes and battens. |
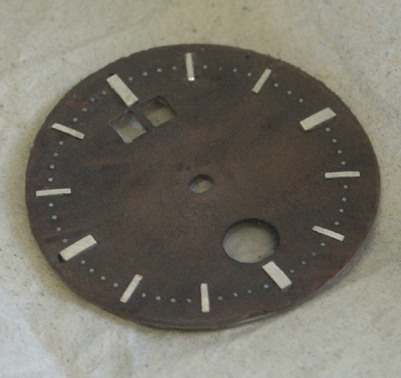
August 10th 2006 The finished Walnut Dial with Silver battens and Nickel-Silver minute 'dots'. Minute dots are created by pushing 0.315mm dia wire into a nominal 0.3mm hole then snipping off flush, after which the slightly protruding dots are trimmed back with 600grit abrasive cloth which also takes the surface off the Walnut. Further 'polishng' is done with finer cloth. The battens have a rebate milled on the inside end so that they overlap the end of the milled slot in the Walnut. 3, 6, 9 & 12 hour battens are 1mm square with a 0.6 x 0.8mm rebate and go right through the Walnut to sit on the acrilic base, whereas the other hours are .5mm square with a 0.3 x 0.6mm rebate so that they sit 0.2mm proud in the 0.3mm deep slots. |
||
|
For the members of the Model Engineering Newsgroup.
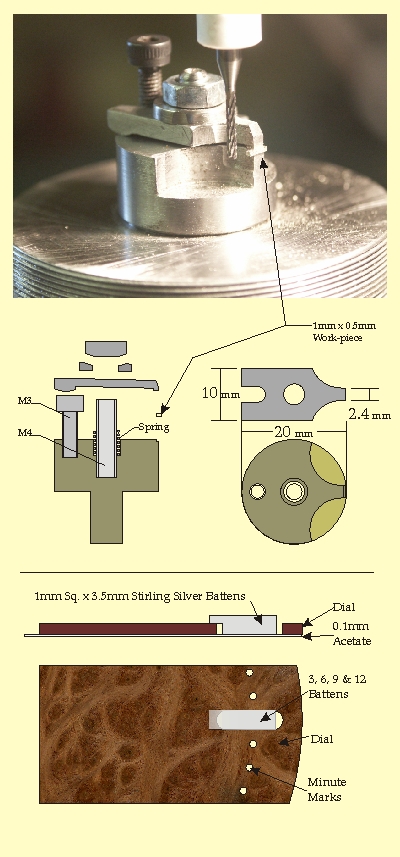
This is the 'Vice' I've made to mill the Battens from 1 x 0.5 mm Nickel-Silver. The cutter is a 1.15mm solid carbide slot drill which I run at 20000rpm taking cuts of 0.01mm trimming the length of the batten to 3.5mm for 3,6,9 & 12 and 2.5mm for the other hours. The Nickel-Silver I get is only nominally 1mm wide - in fact there is a cutting 'ridge'down each side making it about 1.05mm which has to be trimmed off. The short hour battens then have to be reduced to 0.6mm wide so that they don't stand proud of the dial. I also intend to use this 'vice' to trim Ebony and various other hard woods where the need for contrast with the dial needs something other than 'silver'. June 6th 2006 I've now found a source of 0.5mm Sq and 1mm Sq Stirling Silver which I will use instead of the Nickel-Silver - the 3, 6, 9 & 12 markers coming from the 1mm and sitting 0.4mm proud of the dial and the other hours from the 0.5mm set 0.3mm into the dial therefore sitting 0.2mm proud. All the battens will have to have a rebate cut out of them to cover the radiused hole created by the cutters of course. |
|

|
 Giant Watch
|
 History
|
 Home
Home
|
Projects |
 Materials
|

|